
Generic tracking pixel instructions
If your brand isn't using one of these ecommerce platforms, then you will need to manually install Roster's link tracking and order tracking pixels.
This guild will cover installing Roster's link tracking pixel and Roster's order tracking pixel, both of which are required to be installed to use Roster's sales attribution features such as tracking link clicks, attributing referrals to ambassadors, and creating referral rewards.
Google Tag Manager
We strongly discourage installing Roster's tracking pixels through Google Tag Manager (GTM). More and more browsers and extensions block GTM from loading, thereby blocking Roster's tracking pixels from working.
We recommend installing Roster's tracking pixels directly in your e-commerce platform or website's global theme/template.
Step 1: Get a public access API token
Each of the two tracking pixels require a public access token in order to securely send tracking data from a customer's browser to your Roster account. You can use the same public access token for both tracking pixels.
Log into your Roster account.
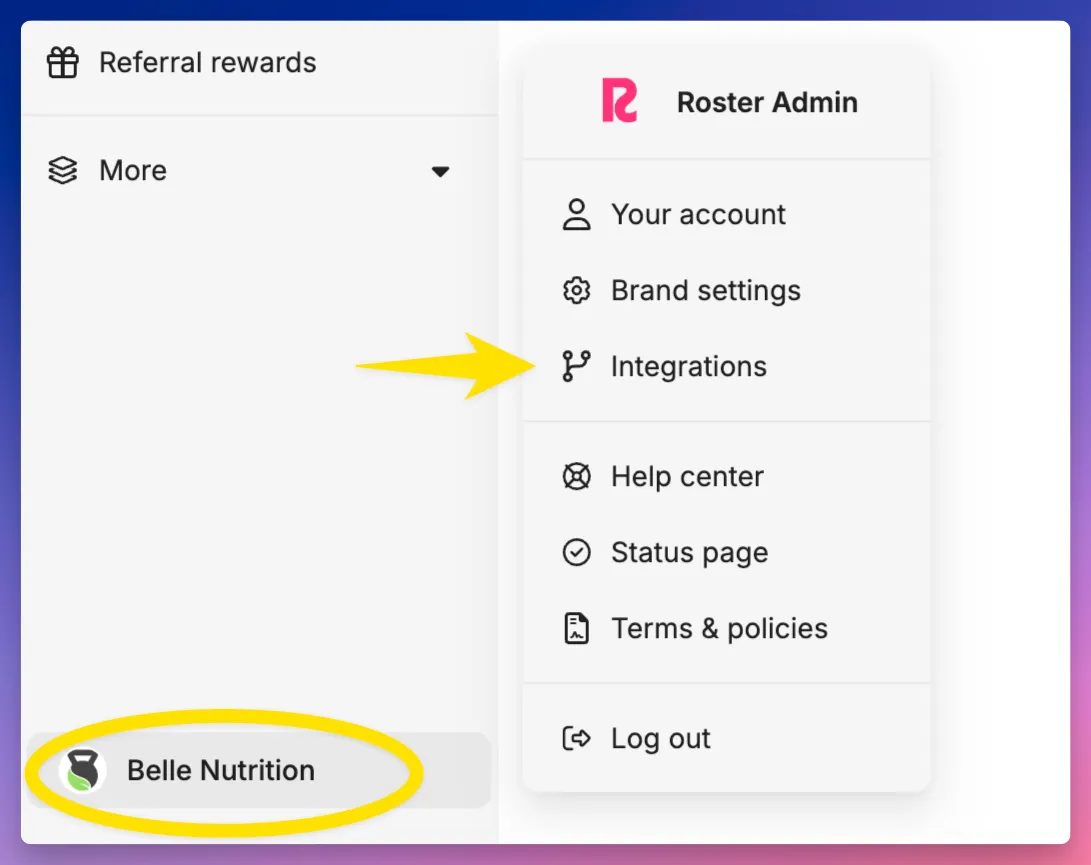
Go to the API integration page by clicking on your brand's name in the left-hand navigation, then Integrations > API integration
Copy the newest Public Access Token if one exists, or click New Access Token to create a new one.
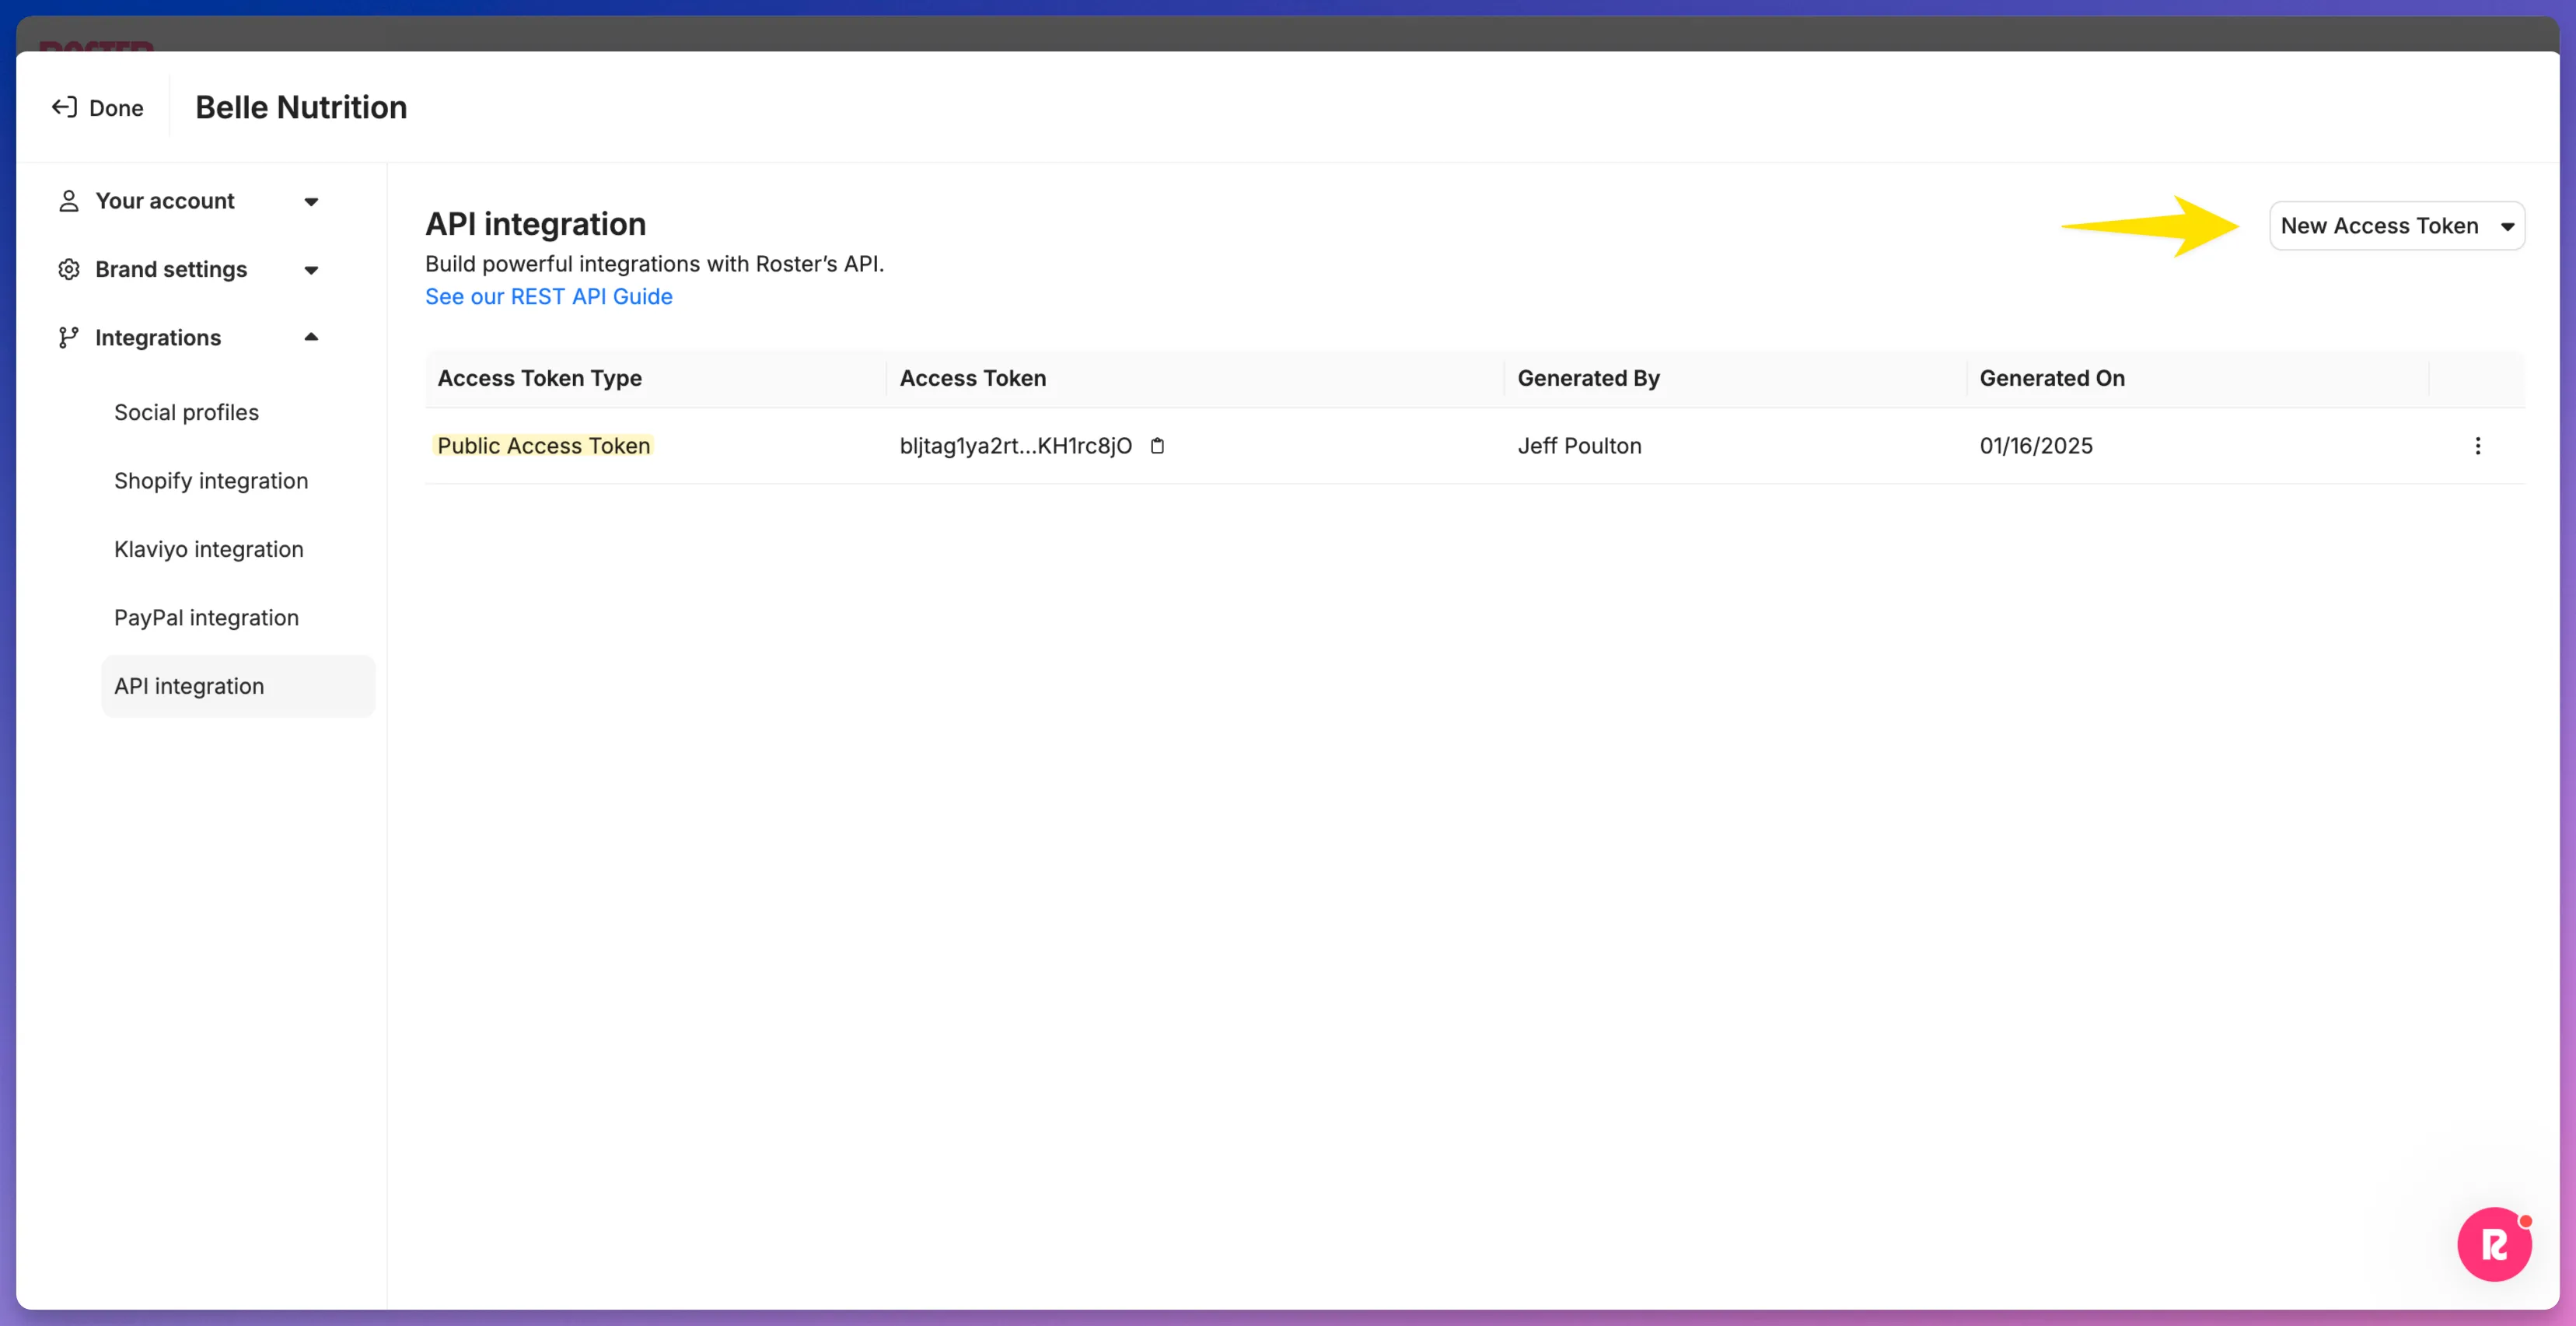
Never use Private Access Tokens with Roster's tracking pixels. Public Access Tokens are safe to use in a browser environment, but Private Access Tokens are only intended for server-side usage as they allow full access to all Roster API endpoints.
Step 2: Install the link tracking pixel
Roster's link tracking pixel tracks link clicks from ambassadors' referral links and stores ambassadors' referral link IDs in the browser to track subsequent purchases.
Paste the Javascript tag just before the closing </head> tag in your e-commerce platform or website's global template.
<script type="text/javascript">
  window.roster = {
    config: {
      token: 'PUBLIC_ACCESS_TOKEN',
      forceShareableCodeFetch: true
    },
    onClickTracked: function() {
      // Optional callback. See table below for details.
      console.log('Click tracked');
    },
    onCodeRetrieved: function(discountCode) {
      // Optional callback. See table below for details.
      console.log('Discount code:', discountCode);
    },
    onError: function(error) {
      // Optional callback. See table below for details.
      console.error('Roster pixel error:', error);
    }
  };
</script>

<script async type="application/javascript"
src="https://cdn.rostercdn.com/sa.js"></script>Replace PUBLIC_ACCESS_TOKEN in the Javascript tag with the Public Access Token from Step 1 above.
Verify the link trakcing pixel.
After your have published the changes to your storefront or website, verify that link tracking is working by using an ambassador's referral link from your Roster account.
See Verify installation with Roster's Chrome Extension to speed up the verification process using Roster's Chrome browser extension.
Be sure you install the link tracking pixel in a way that will allow it to run on each page load. This will ensure that regardless of which URL ambassadors share as their referral link, Roster will capture incoming link clicks and store the referral link IDs for purchases made by referred customers.
Step 3: Install the order tracking pixel
Roster's order tracking pixel is an order-aware Javascript pixel that needs to be installed on the order confirmation page (the page that loads immediately after a customer completes a purchase.)
Copy the following Javascript tag to your clipboard.
<!-- START: Roster Order Submission-->
<script type="application/javascript">
function submitOrder() {
 if (sAttribution) {
   sAttribution.set({
     orderDate: "2024-01-12T12:59:59", // Recommended; Format the date as YYYY-MM-DDT00:00:00; defaults to the current datetime if not provided.
     orderId: "123456", // Required
     orderNumber: "56789ABC", // Recommended if your platform has both a numeric ID and a user-friendly order number; defaults to orderId if not provided.
     currency: "USD", // Required
     subtotalPrice: 17.00, // Recommended; it should be the order total after discounts have been applied, but before taxes and shipping; this is used by Roster to calculate commissions; defaults to totalPrice if not provided.
     totalPrice: 29.99, // Required
     discountCodes: ["sale2020", "janedoe123"], // Recommended; Used by Roster to track code usage and sales attribution.
     email: "[email protected]", // Required; this is used by Roster's sales attribution logic.
     customerId: "9876ABC", // Recommended; this is used to help determine if a customer is new or existing.
     firstName: "John", // Optional
     lastName: "Doe", // Optional
   });
   sAttribution.emitOrder();
 }
}

var saScript = document.createElement("script");
saScript.addEventListener("load", submitOrder);
saScript.src = "https://sa.getroster.com/sa.js?token=PUBLIC_ACCESS_TOKEN";
document.body.appendChild(saScript);
</script>
<!-- END: Roster Order Submission -->Paste the Javascript tag just before the closing </head> tag on the order confirmation page or the page that loads upon a successful conversion.
Replace PUBLIC_ACCESS_TOKEN in the Javascript tag with the Public Access Token from Step 1 above.
Step 4: Verify the installation process
It's imperative that you test the link tracking and order tracking upon completing the above steps.
See Verify tracking pixel installationVerify tracking pixel installation for a video walkthrough and detailed steps and Verify installation with Roster's Chrome Extension.
Need help?
If you have any questions about adding hidden products to product rewards, contact us at [email protected].